

Image annotation is the process of adding comments or markers directly onto specific areas of an image to provide clear, contextual visual feedback.
It helps eliminate ambiguity, improve communication and collaboration, and ensure that different interpretations don’t lead to confusion, misalignment, or repeated revisions.
Instead of relying on scattered emails, chat messages, or verbal explanations, image annotation uses specialized tools in which images are marked with structured visual elements, such as area annotations (bounding boxes, highlights), point annotations (pins, arrows, lines), and freeform markings.
By establishing clear standards and review guidelines, limiting each annotation to a single issue, and reviewing annotations for clarity, conflicts, and technical feasibility, teams, clients, and stakeholders can annotate images with precision and preserve alignment across every revision.
What is image annotation?
Image annotation is the practice of adding markups, comments, notes, visual indicators, or location-specific instructions directly within images to eliminate ambiguity, clarify required changes, and improve review accuracy.
In collaborative design workflows, its core purpose is to place feedback at the exact point of concern to help stakeholders, reviewers, and designer teams communicate precise visual intent and implement changes without gaps in context, interpretation errors, or clarification loops.
Unlike general comments, chat messages, or email threads that lack specificity, detach feedback from the reference, and leave scope for misinterpretation, guesswork, and rework, image annotation using tools functions as a communication system that converts subjective observation into clear, executable guidance.
P.S.- In AI and computer vision contexts, image annotation refers to labelling objects within images to train machine learning models for accurate classification and interpretation of visual data.
What are the benefits of image annotating?
Image annotation eliminates ambiguity, strengthens accountability, improves review precision, prevents subjective interpretations, and accelerates revision cycles in visual workflows.
- Eliminates miscommunication and ambiguity: When feedback is attached exactly to the specific locations on the image, teams don’t waste time decoding vague comments or reconciling multiple interpretations of the same feedback. This clears confusion, reduces back-and-forth clarification, and keeps revisions focused and actionable.
- Improves collaboration and accountability: Annotations create a visible, structured feedback environment that enables multiple reviewers and designers to collaborate simultaneously without losing context. By documenting feedback within the visual itself, every change is traceable to what was flagged, who raised it, and how it was addressed.
- Improves review accuracy and implementation: Reviewers evaluate visual elements and verify corrections with more precision using contextual feedback. Designers immediately identify the exact issue and understand the intended instruction to implement changes correctly.
- Speeds up revision cycles and approval workflows: Clear, location-specific guidance gives designers exact instructions on what needs to change, where, and why, resulting in faster iterations and smoother approvals.
- Prevents subjective interpretations and overlooked issues: Annotation reduces opinion-based confusion by converting subjective interpretation into structured, actionable guidance. With visual anchoring, even smaller details are less likely to be ignored or forgotten.
- Supports centralization and version tracking: Annotation centralizes feedback, decisions, and revisions in one place while linking them to specific drafts or versions. Teams can revisit previous comments, track changes, and compare versions to understand why decisions were made and what those decisions were.
How to annotate an image?
Annotating an image is a multi-step process that involves first identifying the purpose of the feedback, selecting a suitable tool, marking the uploaded image using appropriate annotation elements, and attaching clear, executable instructions to specific visual areas.
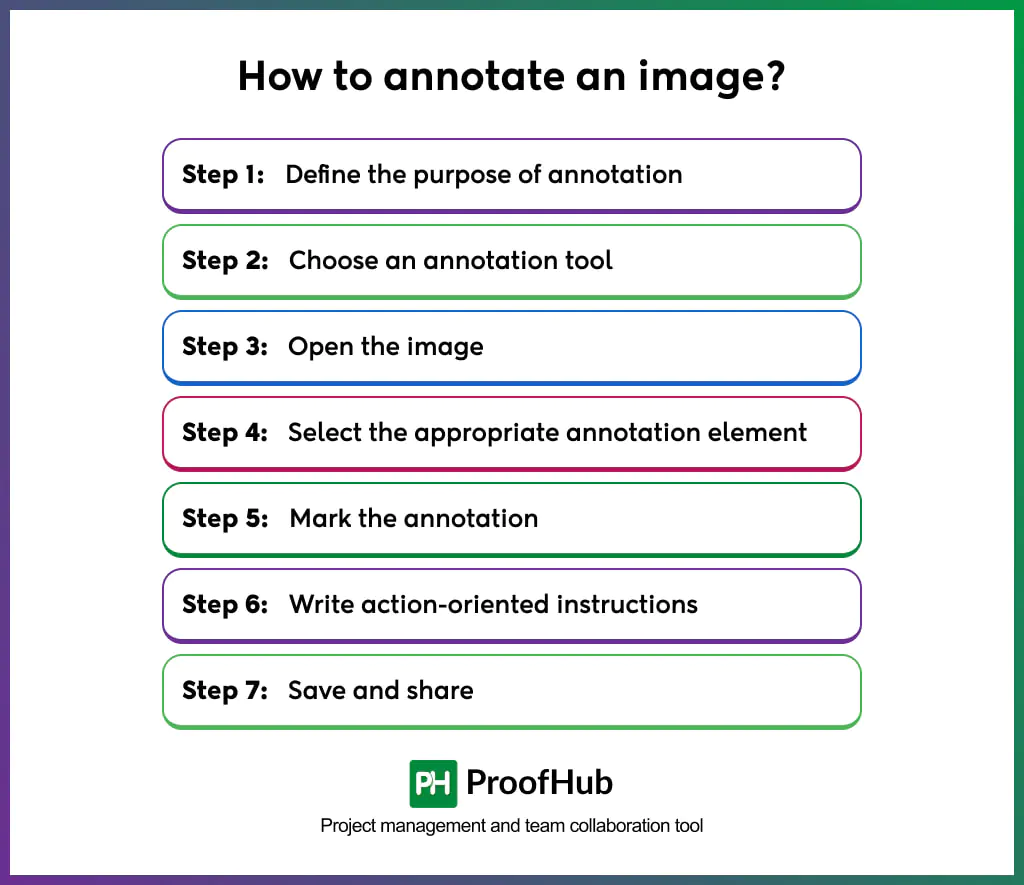
Step 1: Define the purpose of annotation
Start by clarifying the intent behind why the annotation is necessary and what outcome you expect from it. It helps reviewers deliberately reflect on their requirements, objectives, and expectations to achieve measurable improvements from their feedback.
Clear, focused feedback is much easier for designers to execute than vague, scattered, or opinion-based instructions. These instructions lead to purposeful annotations instead of random markups.
Step 2: Choose an annotation tool
The next step is to select a tool that supports structured, collaborative annotation. Look for features, such as
- Location-specific comments
- Visual markers (pins, arrows, labels, highlights)
- Version tracking
- File format support
- Real-time collaboration
Choose a tool that supports annotation while supporting your team’s workflow, review cycle, and collaboration needs.
Step 3: Open the image
Upload the image to the tool and ensure it is the correct version to be annotated.
Start by inspecting the image carefully. Zoom in and out as needed, and review every component for potential issues such as spacing inconsistencies, typographical errors, alignment problems, visual quality concerns, or incorrect data labels to pinpoint even fine details.
Step 4: Select the appropriate annotation element
Next, choose the visual marker that best matches the required level of precision.
- Arrows: Point to a specific element
- Highlight: Emphasize an area
- Bounding box or circle: Enclose a certain section or region
- Freehand mark: Indicate irregular segments
- Numbered markers: Sequence multiple feedback points
- Color coding: Categorize by priority (e.g., red for critical, yellow for suggestions)
- Pin: Attach a detailed comment at a precise location
Step 5: Mark the annotation
Place the chosen annotation element directly on the area of concern to improve precision and eliminate ambiguity. Click, drag, or drop these markers to ensure designers receive exact visual direction.
Avoid:
- Vague comments
- Marking unnecessary areas
- Placing markers near, but not on, the issue
- Visual clutter
Step 6: Write action-oriented instructions
Add instructions that are clear, concise, and executable so designers exactly know what needs to change. Your annotations should be:
- Specific: “Increase right margin to 24px” instead of “Fix spacing.”
- Clear: “Change font to Bold 18pt” instead of “Make this bigger.”
- Actionable: “Align text to the left grid margin” instead of “Alignment is off.”
- Contextual: Explain why, if required, e.g., “Reduce opacity to 70% for better text readability.”
The structured instruction style improves communication and feedback implementation accuracy.
Step 7: Save and share
Save your annotated image in an appropriate format and share it either directly, via secure shareable links, or through collaboration platforms.
If the image is in a centralized environment, simply tag or mention the relevant stakeholders so they can easily assess the annotated version.
Maintain version control, so feedback remains linked to the correct draft.
3 Methods to annotate an image
Image annotation is executed through manual, collaborative, and automated methods, depending on the purpose, scale, and workflow requirements.
1. Manual Annotation
It is a traditional method in which a single individual reviews images and adds annotations using markers, comments, or highlights in a chosen tool. It is ideal for personal review tasks or projects that require detail, contextual understanding, and specialized expertise.
Advantages:
- High control over precision.
- Enables faster individual review and decision-making.
- Reduces dependency on constant coordination.
Limitations:
- Captures only one perspective.
- Potential for human bias, oversight, or inconsistencies.
- Largely dependent on one person.
2. Collaborative annotation
It is a team-driven, shared method in which multiple team members review, annotate, and contribute insights to the same image, simultaneously or sequentially, on a shared platform.
It is ideal for complex design reviews and team-based workflows that require cross-functional feedback, multiple review rounds, or multi-stakeholder expertise.
Advantages:
- Involves diverse perspectives.
- Encourages transparent communication and discussions.
- Builds shared accountability and understanding.
Limitations:
- Requires structured coordination
- Risk of conflicting feedback
- Too many annotations can clutter the visual.
3. Automated annotation
It is a technology-driven method in which AI algorithms or software use rule-based logic or trained models to automatically detect, label, or classify elements in an image. It is ideal where large-scale, repetitive, and faster annotation execution is required.
Advantages:
- Scalable for large datasets.
- Trained on machine learning models.
- Faster than manual annotation.
Limitations:
- Lacks contextual judgment.
- Requires human verification or validation.
- Accuracy depends highly on the learning model.
What are the types of image annotation?
Image annotation types include pointer-based, area-based, text-based, and freeform annotations, each to support different review needs and levels of precision.
1. Point annotations
These annotations direct attention to a specific point or location within an image. These are best used where precision matters most.
- Arrows: Indicate direction, flow between elements, or point to an exact element
- Lines: Indicate distance, connect elements, or show alignment references
- Comment pins: Attach contextual notes at a fixed point
- Numbered pins: Sequence multiple feedback points
2. Area annotations
These annotations highlight a specific area within an image. They are best used where broader sections need to be reviewed or revised.
- Bounding boxes: Enclose specific sections that need attention
- Rectangles: Highlight structured regions without obscuring content
- Ellipses/Circles: Emphasize focal points in rounded or irregular areas
- Highlights: Visually emphasize sections without obstructing underlying content.
- Blur: Mask sensitive content while maintaining overall image context
- Zoom: Magnify a specific section for more details and clarity
- Crop: Remove unwanted portions to eliminate distractions.
- Spotlight/Focus: Highlight specific areas while the surroundings fade.
3. Text annotations
These annotations allow written instructions within an image. They are best used where contextual clarification is required.
- Labels: Identifies or names elements
- Text boxes: Provide detailed explanations or corrections
- Tags: Categorize by status, type, or priority
4. Freeform annotations
These annotations allow irregular, unrestricted, and flexible marking within an image. They are best used where rough visual explanations are required.
- Freehand drawing: Mark complex or irregular regions.
Best practices to follow for effective image annotation?
Effective image annotation happens when there are established review guidelines, version control, and collaborative alignment.
1. Establish clear guidelines: Define annotation standards, consistent vocabulary, timelines, and platform practices to ensure everyone understands expectations, agrees on processes, and follows a shared review structure. These guidelines bring everyone on the same page and reduce subjectivity or inconsistencies.
2. Limit one issue per annotation: Ensure each annotation marks a single issue to improve understanding and make resolution tracking easier. Combining multiple concerns into one comment makes it difficult to verify what has been fixed.
3. Avoid overcrowding: Do not place multiple overlapping markers within the image, as it clutters the visual and makes feedback difficult to interpret. If necessary, break feedback into sections, use numbered markers and separate feedback across versions
4. Review for clarity and conflicts: Before finalizing and sharing annotated images, review them to confirm that the annotations are unambiguous. Look for unclear instructions, vague words, or incomplete specifications that may confuse designers or lead to incorrect revisions. Also, when multiple reviewers are involved, ensure annotations do not conflict with each other or give two different directions for the same element.
5. Verify accuracy before sharing: Confirm whether annotations are clearly defined, marked on the correct version, and aligned with current official standards or brand guidelines. Check if the instructions are technically feasible and realistic within project constraints.
6. Optimize for collaboration: Utilize a tool that supports threaded discussions, contextual commenting, and resolution tracking so everyone involved can collaborate efficiently.
What are the best tools for image annotation?
The best tools for image annotation include general annotation tools, design-specific tools, and visual feedback & collaboration platforms, each serving different workflow needs.
1. General annotation tools: These tools provide simple, in-context markup and annotation features for reviewing images, documents, and creative assets. E.g., Filestage, GoVisually
Best for: Teams that need straightforward file review and structured approval processes.
2. Design-specific tools: These tools are built for design creation, with integrated commenting for real-time collaboration within the design environment. E.g., Figma, Sketch
Best for: UI/UX designers and product teams working on interactive mockups and prototypes.
3. Visual feedback & collaboration tools: These tools combine image annotation with workflow tracking and structured collaboration for tracking changes, approvals, and threaded discussion on images. For e.g. ProofHub, Ziflow.
Best for: Cross-functional teams that require annotation alongside organized workflows.
Which teams benefit most from image annotation?
Image annotation is most useful for any team whose work involves reviewing, iterating on, and approving visual assets.
- Design and creative teams: Graphic designers, UI/UX designers, brand teams, and creative directors use image annotation for design reviews and feedback cycles.
- Marketing and content teams: Marketing managers, content creators, social media managers, and brand strategists rely on image annotation for social media graphics, advertisements, and campaign approval.
- Product and development teams: Product managers, software developers, QA testers, and DevOps engineers annotate screenshots, wireframes, prototypes, and UI mockups.
- Quality assurance and manufacturing teams: QA inspectors, quality control specialists, and manufacturing engineers depend on image annotation for product photos.
- E-commerce and retail teams: Product, photographers, merchandising teams, and e-commerce managers use annotation for product images.
What are the examples of image annotation?
Here are two examples of image annotation:
1. Social media graphic review
Marketing teams review and annotate social media posts to ensure accuracy and alignment before publishing. Their annotations may look like:
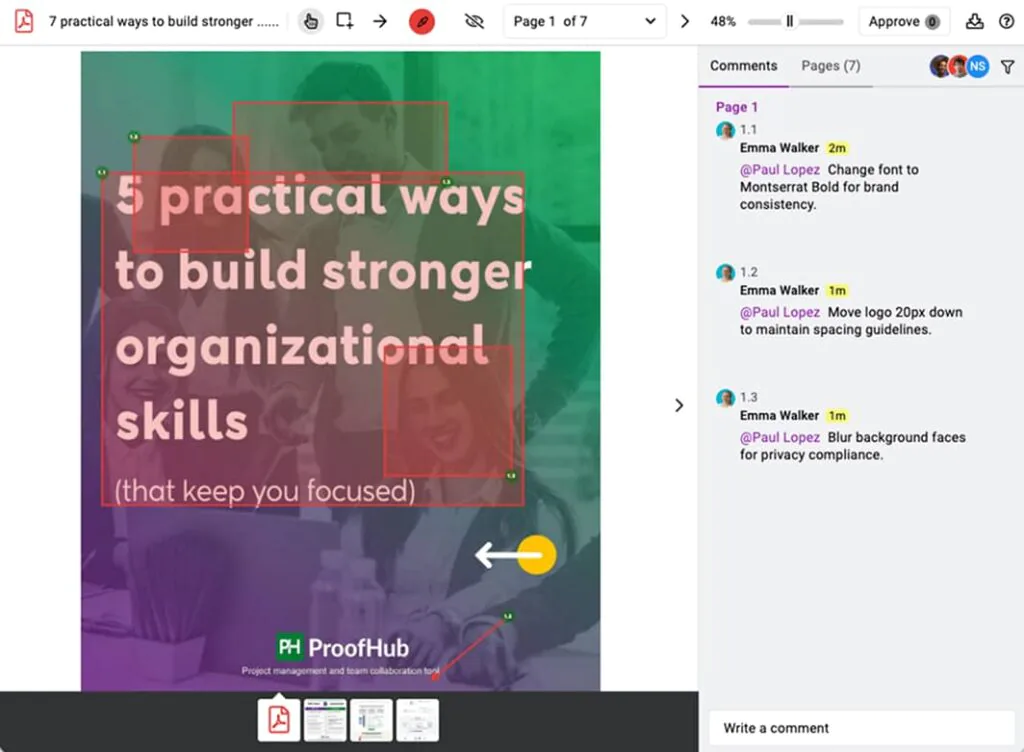
- Rectangle around headline: “Change font to Montserrat Bold for brand consistency.”
→ Ensures typography aligns with brand guidelines.
- Arrow pointing to logo: “Move logo 20px down to maintain spacing guidelines.”
→ Preserves brand integrity and prevents layout imbalance.
- Blur annotation on background faces: “Blur background faces for privacy compliance.”
→ Protects privacy and ensures regulatory compliance.
- Highlight on call-to-action button: “Increase contrast and adjust wording for clarity.”
→ Enhances visibility and conversion effectiveness.
- Comment pin in bottom corner: “Add hashtag #SummerSale2026.”
→ Supports content discoverability.
2. Feature specification feedback
Product and software development teams use annotations to review or define new features, transforming static visuals into executable specifications.
- Highlight on sidebar: “Add search functionality in this section.”
→ Links UI to product requirement documentation.
- Text box instruction: “On hover, display tooltip: ‘Click to expand full details.’”
→ Specifies expected interaction behavior.
- Line showing spacing between cards: “Maintain 24px margin between card elements.”
→ Ensures layout consistency.
- Pin on data table column header: “Enable sorting functionality for this column.”
→ Enhances usability and improves data accessibility.
- Arrow pointing to navigation tab: “Rename tab to ‘Activity Log’”
→ Maintains consistency across the product ecosystem.
What elements can be annotated in an image?
Any textual, graphical, stylistic, structural, or functional element within an image can be annotated to initiate revisions, clarify intent, and ensure precise corrections.
1. Text elements: All the written content within an image can be annotated for wording clarity, grammatical issues, alignment issues, readability, and contrast.
Elements include:
- Headlines
- Body text
- Captions
- Labels
- Buttons
- Font size and typography
2. Colors and visual styling: Color and styling attributes can be annotated for brand alignment and consistency.
Elements include:
- Background colors
- Text contrast
- Brand color compliance
- Gradients
- Shadows
- Borders
3. Icons and graphics: Individual graphical components can be annotated for alignment, sizing, and visual imbalances.
Elements include:
- Icons
- Illustrations
- Logos
- Charts
- Images within layouts
4. Layout and Spacing: Spacing and alignment can be annotated for visual structure and usability.
Elements include:
- Margins
- Padding
- Alignment
- Grid structure
- Component positioning
5. Interactive Elements (UI Context): Clickable or functional elements can be annotated to specify interaction logic, state changes, or user flow expectations.
Elements include:
- Buttons
- Dropdowns
- Forms
- Navigation menus
- Hover states
How is image annotation different from general commenting?
Image annotation differs from general commenting in how feedback is delivered, contextualized, and executed.
General commenting provides text-based feedback with abstract references and lacks connection to the real issue. It relies heavily on verbal descriptions, broad phrasing, and vague language, which creates ambiguity, miscommunication, and interpretation issues.
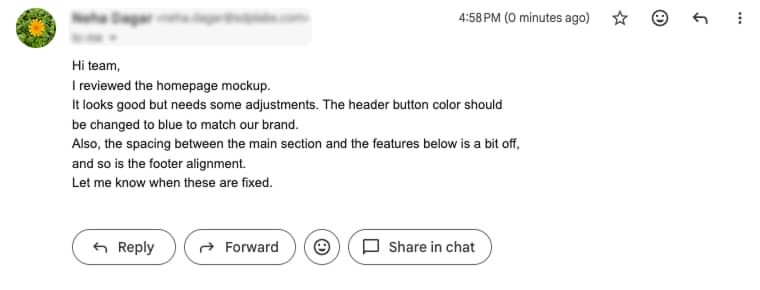
For example: “Hi team, I reviewed the homepage mockup. It looks good but needs some adjustments. The header button color should be changed to blue to match our brand. Also, the spacing between the main section and the features below is a bit off, and so is the footer alignment. Let me know when these are fixed.”
Here, the intent is clear, but it lacks visual anchoring, which increases the risk of revision errors.
Image annotation attaches feedback to the exact location within the image. It keeps comments and revisions centralized for efficient review, preserves context, and supports version-based tracking.
For example: Homepage annotation:
- Arrow to header button → “Change color to #0066CC (brand blue)”
- Line showing vertical space → “Increase margin to 48px”
- Rectangle around footer → “Align left edge with content above.”
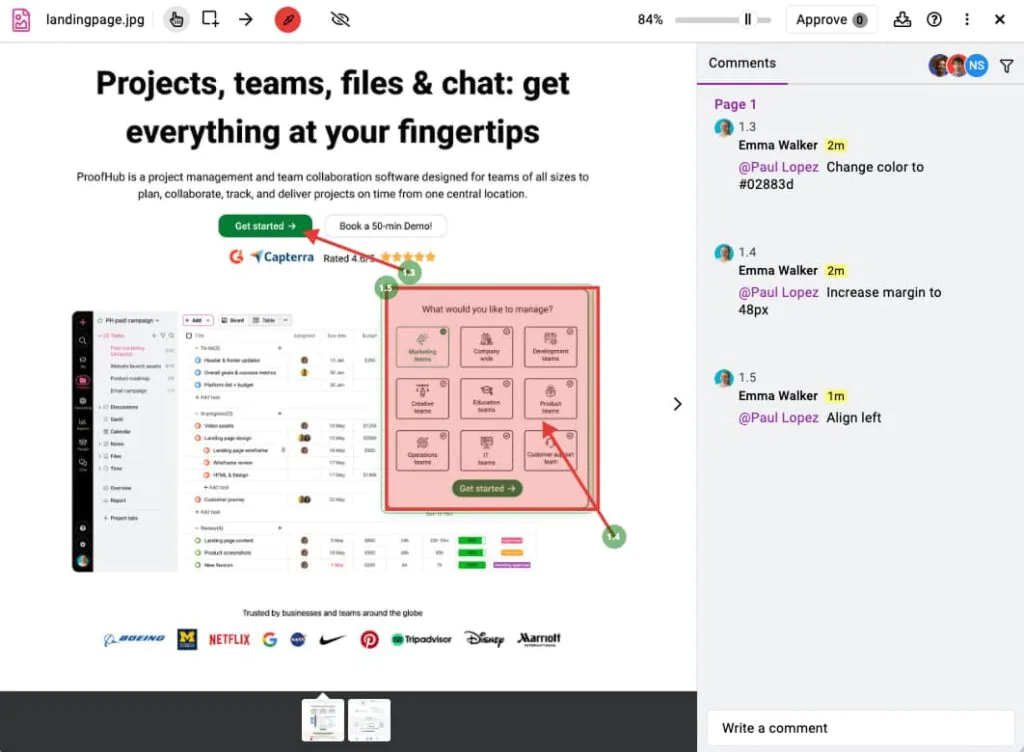
Here, the annotations are visually connected, enhancing the clarity of the instructions.
How does image annotation improve the design review process?
Image annotation improves the design review process by visually contextualizing feedback and consolidating all comments, revisions, and decisions into a single image. Designers spend less time interpreting intended changes and requests and instead apply revisions accurately with confidence.
Centralized comments and instructions reduce back-and-forth, preserve visibility into who suggested and implemented changes, and maintain clear accountability throughout the review cycle.
How does image annotation help reduce revision cycles?
Image annotation allows reviewers to provide specific, location-based feedback on the design, which designers address and implement correctly on the first attempt, without repeated back-and-forth discussions and clarification loops. Designers can also review changes in one place without cross-referencing multiple platforms, preventing oversight and missed comments that lead to additional rounds.